> ## Documentation Index
> Fetch the complete documentation index at: https://second.tech/docs/llms.txt
> Use this file to discover all available pages before exploring further.
# Install the plugin
Install the Bark plugin on your BTCPay Server and set up a Bark wallet for your store.
## Before you start
You need:
* A self-hosted [BTCPay Server](https://docs.btcpayserver.org/Deployment/) on version 2.3.9 or later. Installing plugins requires server admin access, so accounts on [third-party hosts](https://docs.btcpayserver.org/Deployment/ThirdPartyHosting/) won't work.
* A [store](https://docs.btcpayserver.org/CreateStore/) on that server.
You don't need to set up a Lightning node. If you already have Lightning enabled, the Bark plugin will take over your store's Lightning functionality once installed.
## Download and install the plugin
The Bark plugin isn't listed in the BTCPay plugin directory yet, so you install it by uploading the plugin file.
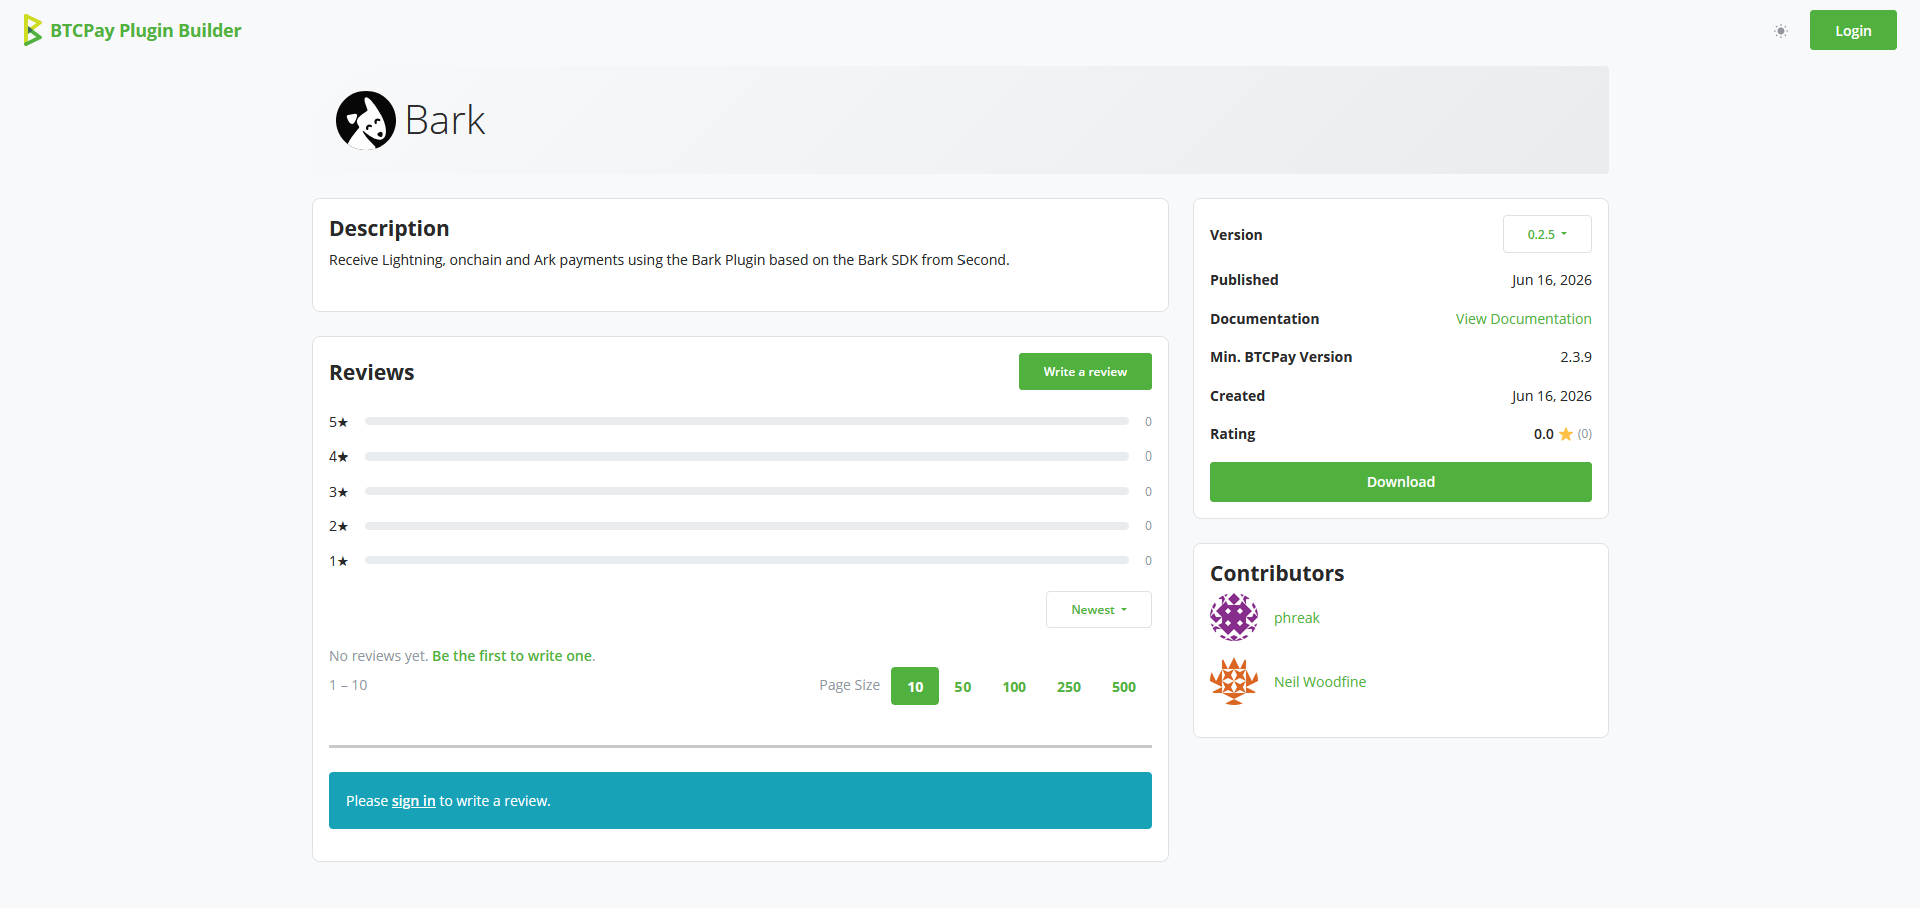
Download `BTCPayServer.Plugins.Bark.btcpay` from the plugin's [official page](https://plugin-builder.btcpayserver.org/public/plugins/bark) on the BTCPay Plugin Builder website.
 Sign in to BTCPay Server as a server admin. At the top right of the interface, select the block icon to open the dropdown menu, then select **Manage Plugins**.
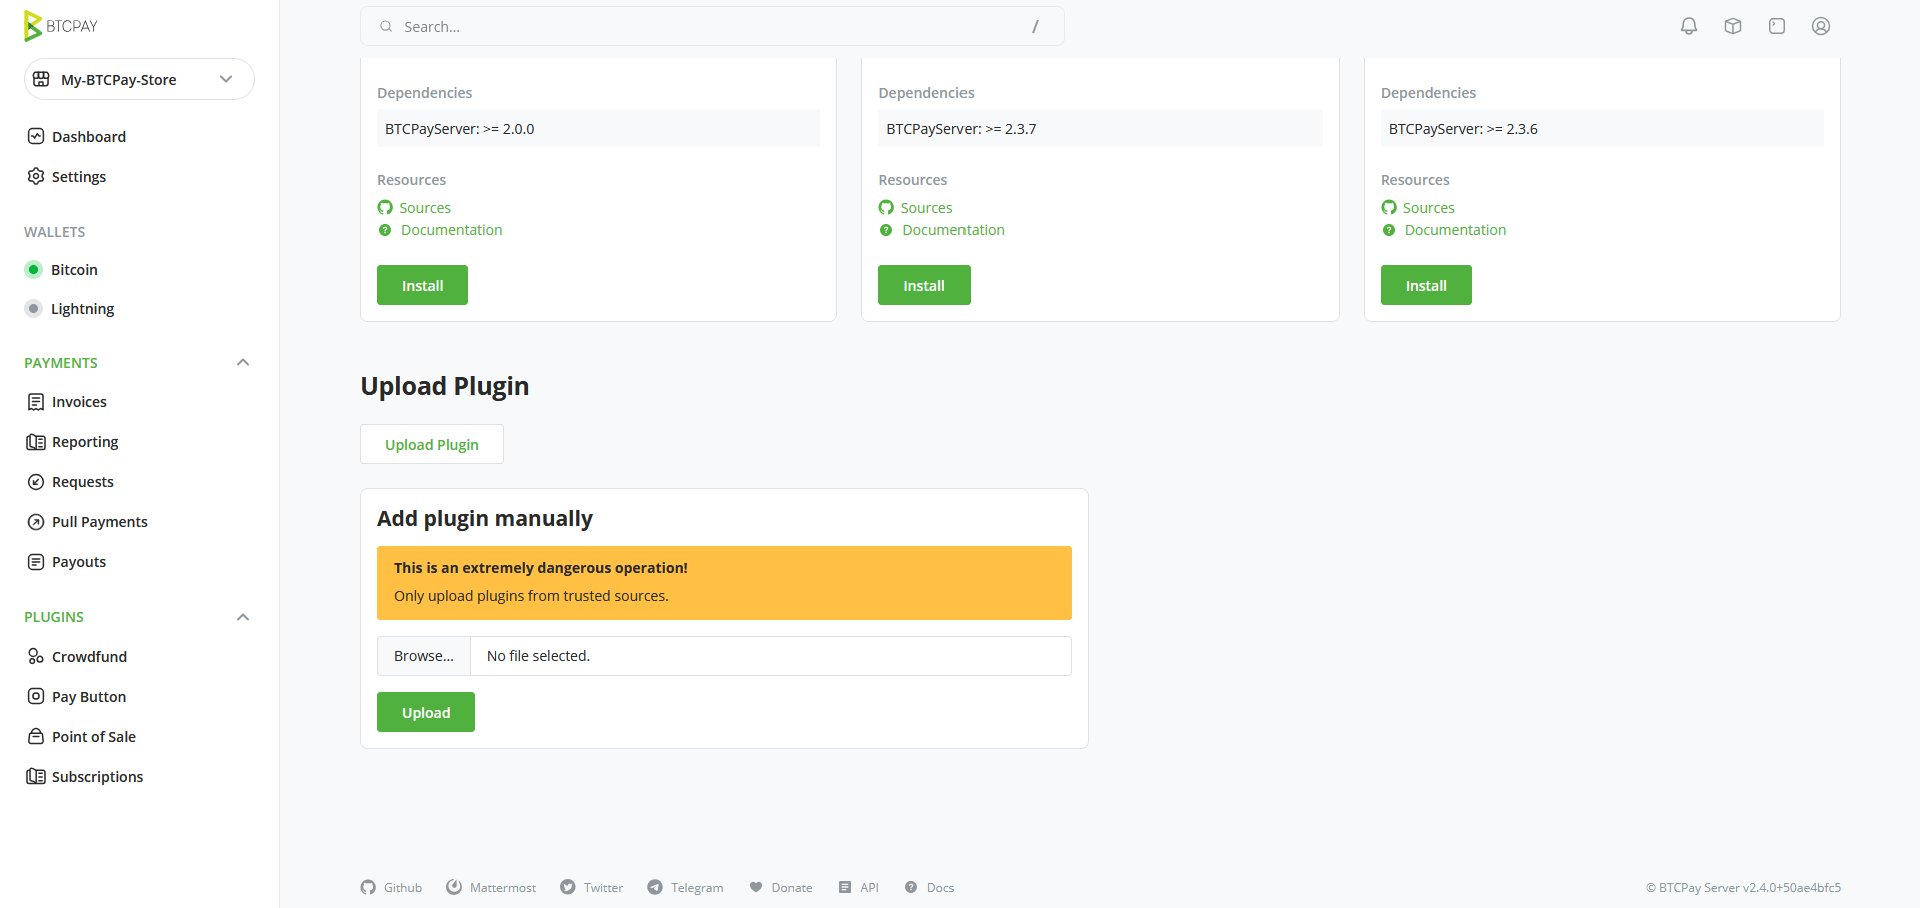
Scroll to **Upload Plugin** at the bottom of the page, below the plugin list. Select **Upload Plugin**, browse to the `.btcpay` file you downloaded, then select **Upload**. The upload can take a few minutes on a slow connection.
Sign in to BTCPay Server as a server admin. At the top right of the interface, select the block icon to open the dropdown menu, then select **Manage Plugins**.
Scroll to **Upload Plugin** at the bottom of the page, below the plugin list. Select **Upload Plugin**, browse to the `.btcpay` file you downloaded, then select **Upload**. The upload can take a few minutes on a slow connection.
 Restart when prompted. BTCPay Server loads the plugin during startup.
## Set up a Bark wallet for your store
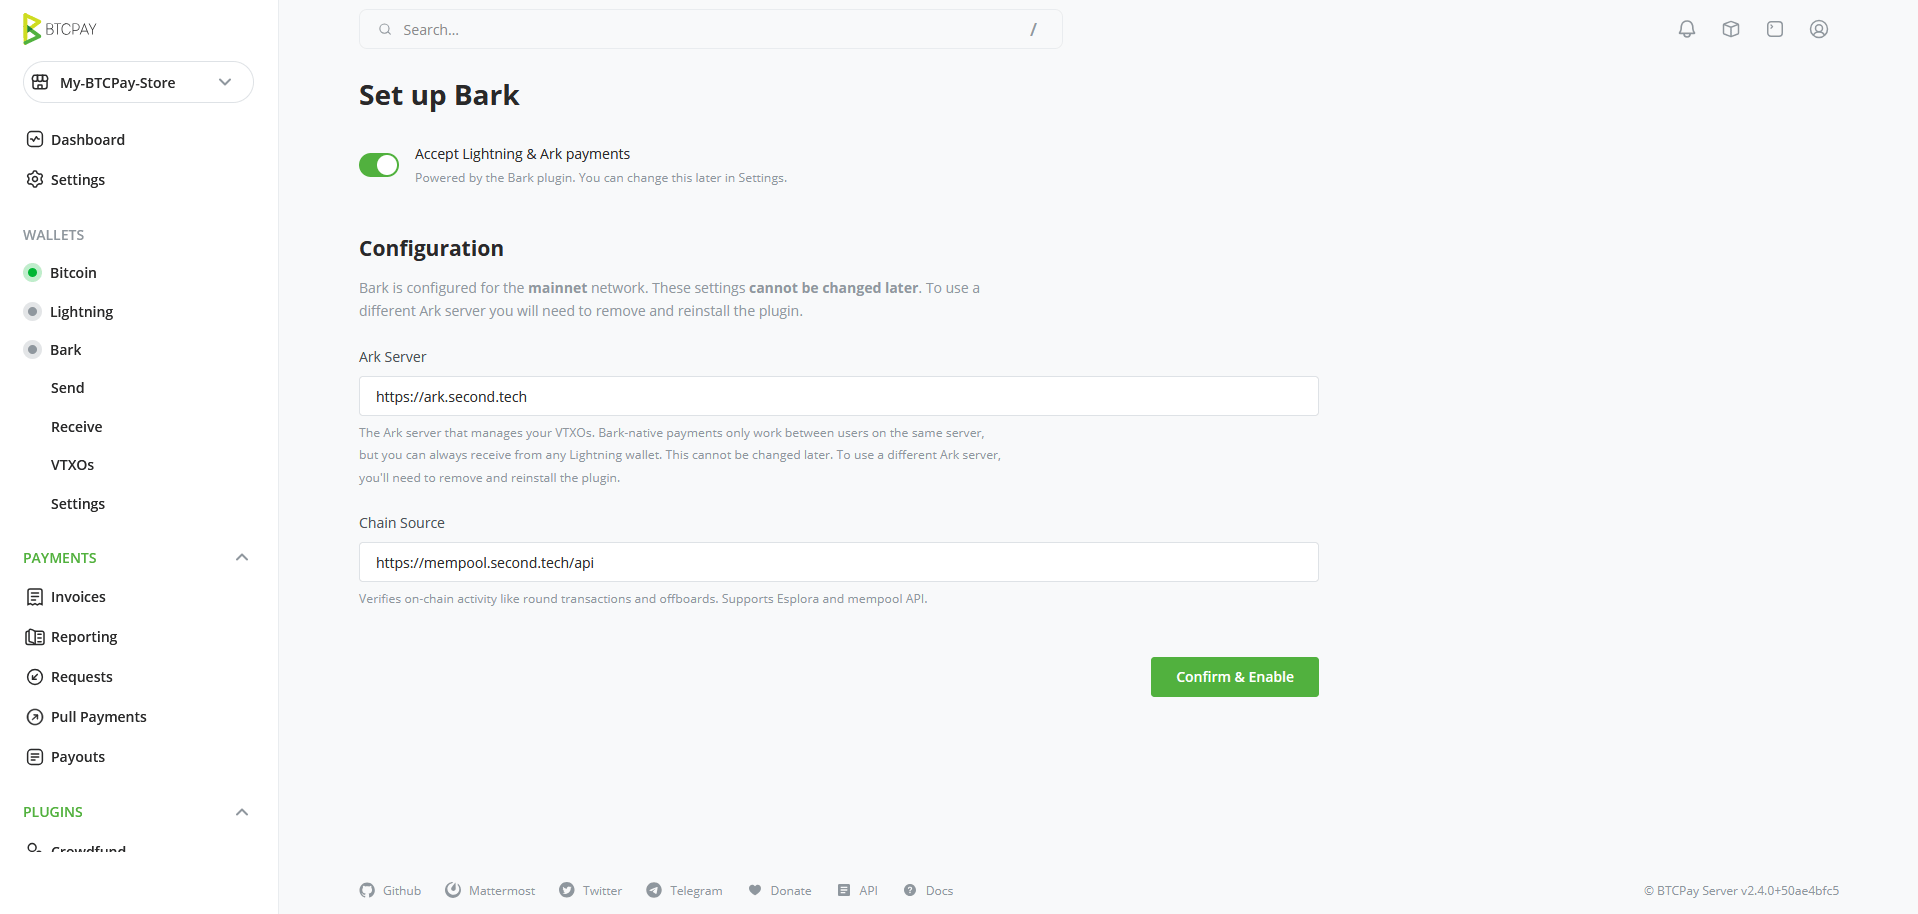
After the restart, your store's sidebar gains a **Bark** entry under Wallets. Opening it for the first time takes you to the **Set up Bark** screen.
Restart when prompted. BTCPay Server loads the plugin during startup.
## Set up a Bark wallet for your store
After the restart, your store's sidebar gains a **Bark** entry under Wallets. Opening it for the first time takes you to the **Set up Bark** screen.
 You can change this later in the plugin's [settings](/docs/btcpay/settings).
Both fields come pre-filled for mainnet: `https://ark.second.tech`, the Ark server that manages your VTXOs, and `https://mempool.second.tech/api`, the chain source that verifies on-chain activity. See [Ark server and chain source](/docs/btcpay/settings#ark-server-and-chain-source) for the available options.
The Ark server and chain source you confirm here can't be changed later. To move the store to a different Ark server, you would need to [remove](/docs/btcpay/uninstall) and reinstall the plugin.
The plugin checks that both endpoints are reachable, creates a Bark wallet for your store, and opens the wallet dashboard.
The plugin creates and manages your store's wallet keys on the server. See [Back up your wallet](/docs/btcpay/backups) to keep them recoverable.
## Lightning is now driven by Bark
Completing setup enables two new payment methods on your store's checkout, Ark and Lightning:
* You should see status lights turn green for Lightning and Bark in the sidebar.
* The Lightning page will show that it is being managed by Bark.
* Checkout will now start showing a QR code and payment link that combines on-chain, Ark, and Lightning payment methods.
After installing the plugin, the first thing to do is [back up your wallet](/docs/btcpay/backups).
You can change this later in the plugin's [settings](/docs/btcpay/settings).
Both fields come pre-filled for mainnet: `https://ark.second.tech`, the Ark server that manages your VTXOs, and `https://mempool.second.tech/api`, the chain source that verifies on-chain activity. See [Ark server and chain source](/docs/btcpay/settings#ark-server-and-chain-source) for the available options.
The Ark server and chain source you confirm here can't be changed later. To move the store to a different Ark server, you would need to [remove](/docs/btcpay/uninstall) and reinstall the plugin.
The plugin checks that both endpoints are reachable, creates a Bark wallet for your store, and opens the wallet dashboard.
The plugin creates and manages your store's wallet keys on the server. See [Back up your wallet](/docs/btcpay/backups) to keep them recoverable.
## Lightning is now driven by Bark
Completing setup enables two new payment methods on your store's checkout, Ark and Lightning:
* You should see status lights turn green for Lightning and Bark in the sidebar.
* The Lightning page will show that it is being managed by Bark.
* Checkout will now start showing a QR code and payment link that combines on-chain, Ark, and Lightning payment methods.
After installing the plugin, the first thing to do is [back up your wallet](/docs/btcpay/backups).