

Create a charge
Use this to bill a customer by hand.1
Go to Charges and select Create charge
2
Enter the amount
Enter the amount in sats. To price the charge in fiat, select the arrows next to sats, enter the amount, and select USD or EUR in the Currency field. The sats amount locks at creation.
3
Add a reference and a description
Reference is for you, for example your order number. Bark Pay shows Description to the customer at checkout. Both are optional.
4
Leave Rails on Automatic
Bark Pay then offers every payment method that fits the amount. Select Lightning, On-chain, or Ark to restrict the charge instead.
5
Select Create charge at the bottom of the drawer
The charge detail opens with its payment details and checkout link.
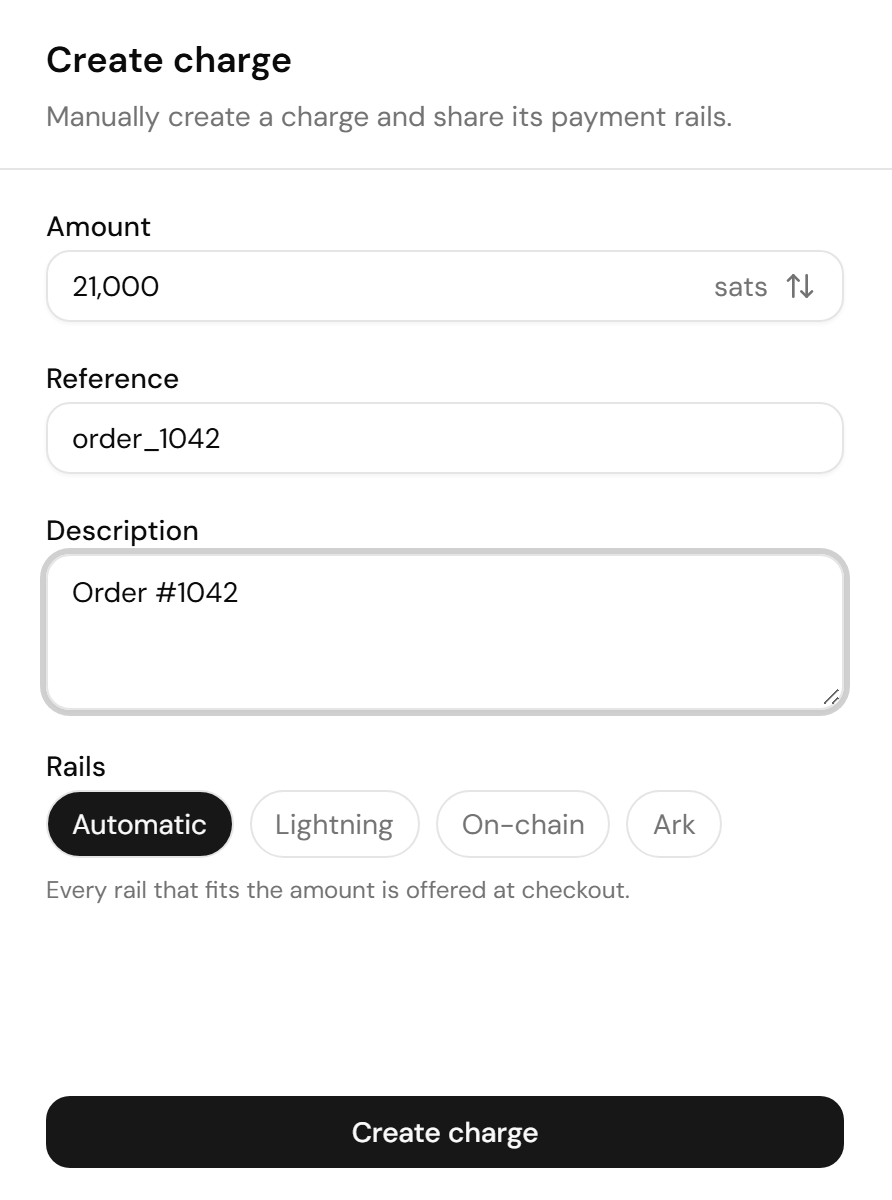
Automatic rails offer every payment method that fits the amount
Share the payment details
Two ways to get paid:- Checkout link: Select Open checkout to preview the hosted checkout page, or copy its URL and send it to your customer.
- Payment rails: Select the Lightning, Ark, or On-chain tab to show that method’s QR code and copy its invoice or address, for example to display at a counter.
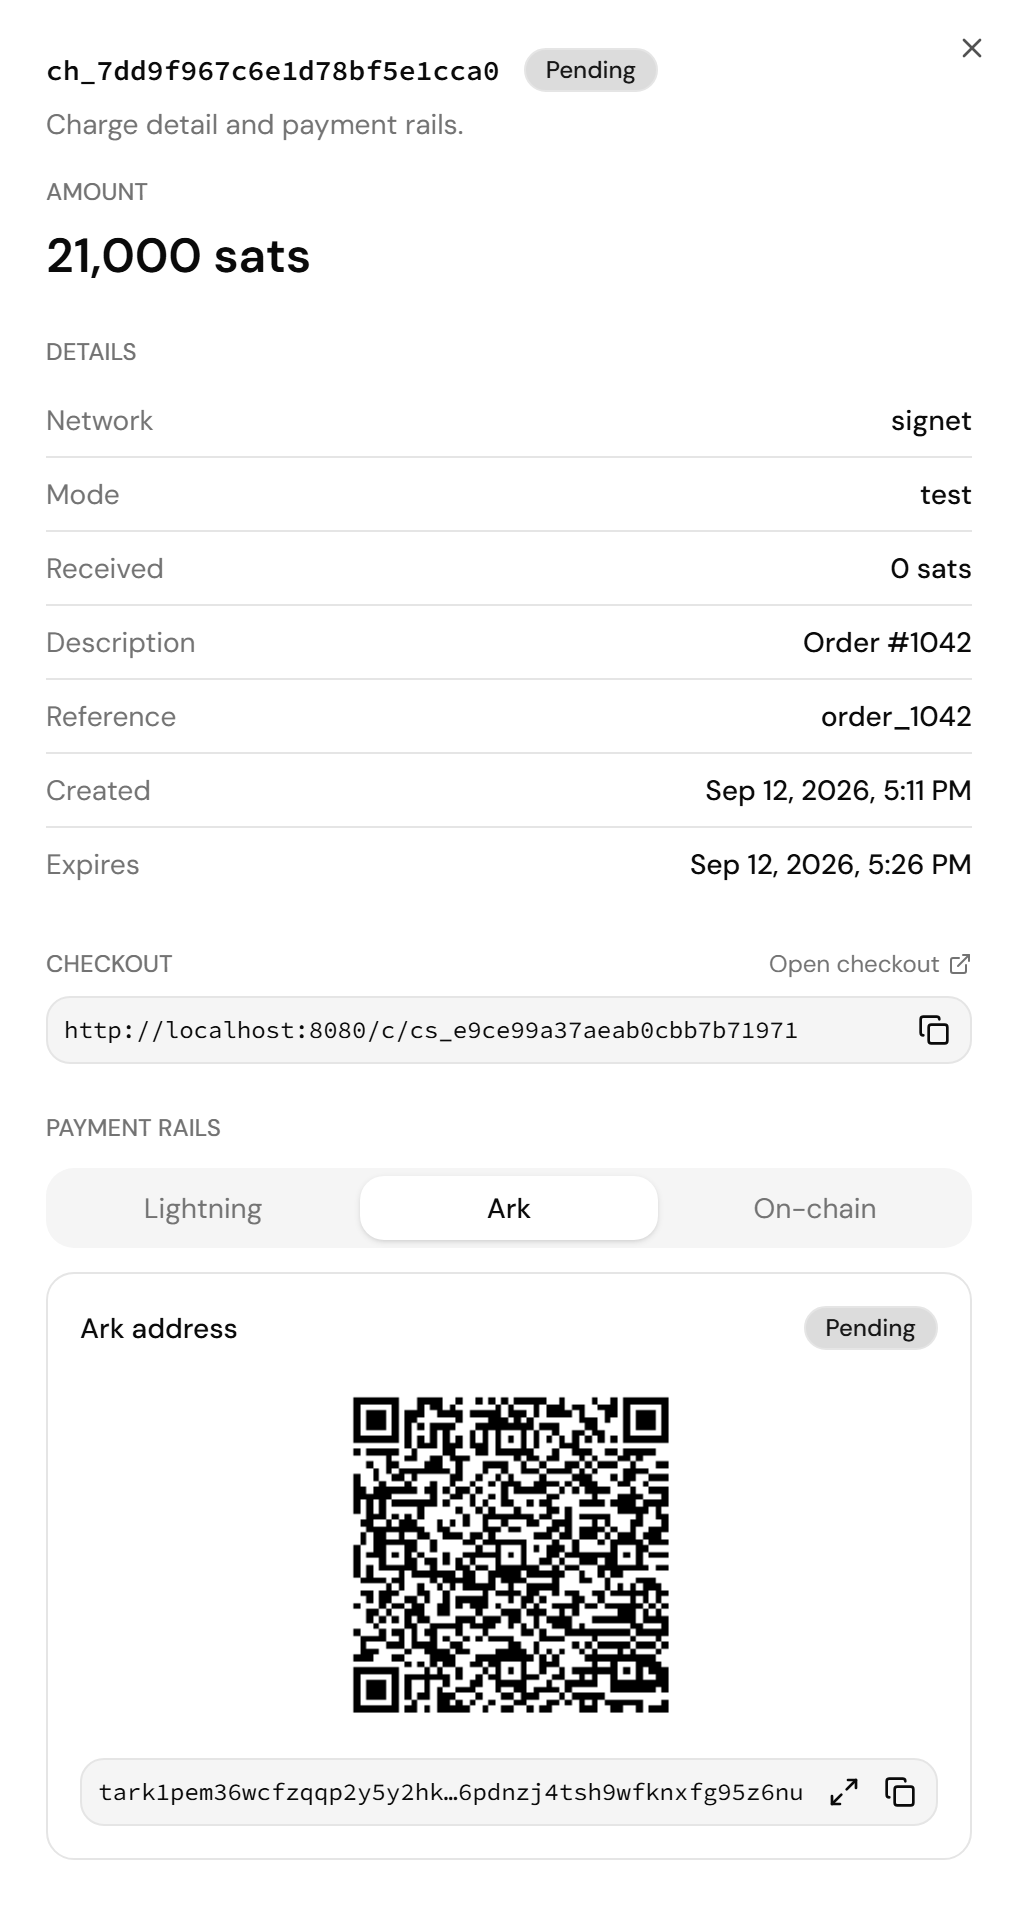
The charge detail carries the checkout link and one QR code per payment method
Follow a charge’s status
While any charge on the page is pending, underpaid, or expired, the list refreshes itself every ten seconds. Filter it with the All statuses dropdown, and select a row to reopen its payment details:
Lightning and Ark payments settle within seconds. An on-chain payment settles once its transaction has one confirmation, so expect a wait of about ten minutes on that method.
The dashboard has no cancel button. To cancel a pending or underpaid charge, use the cancel endpoint with a secret API key.