

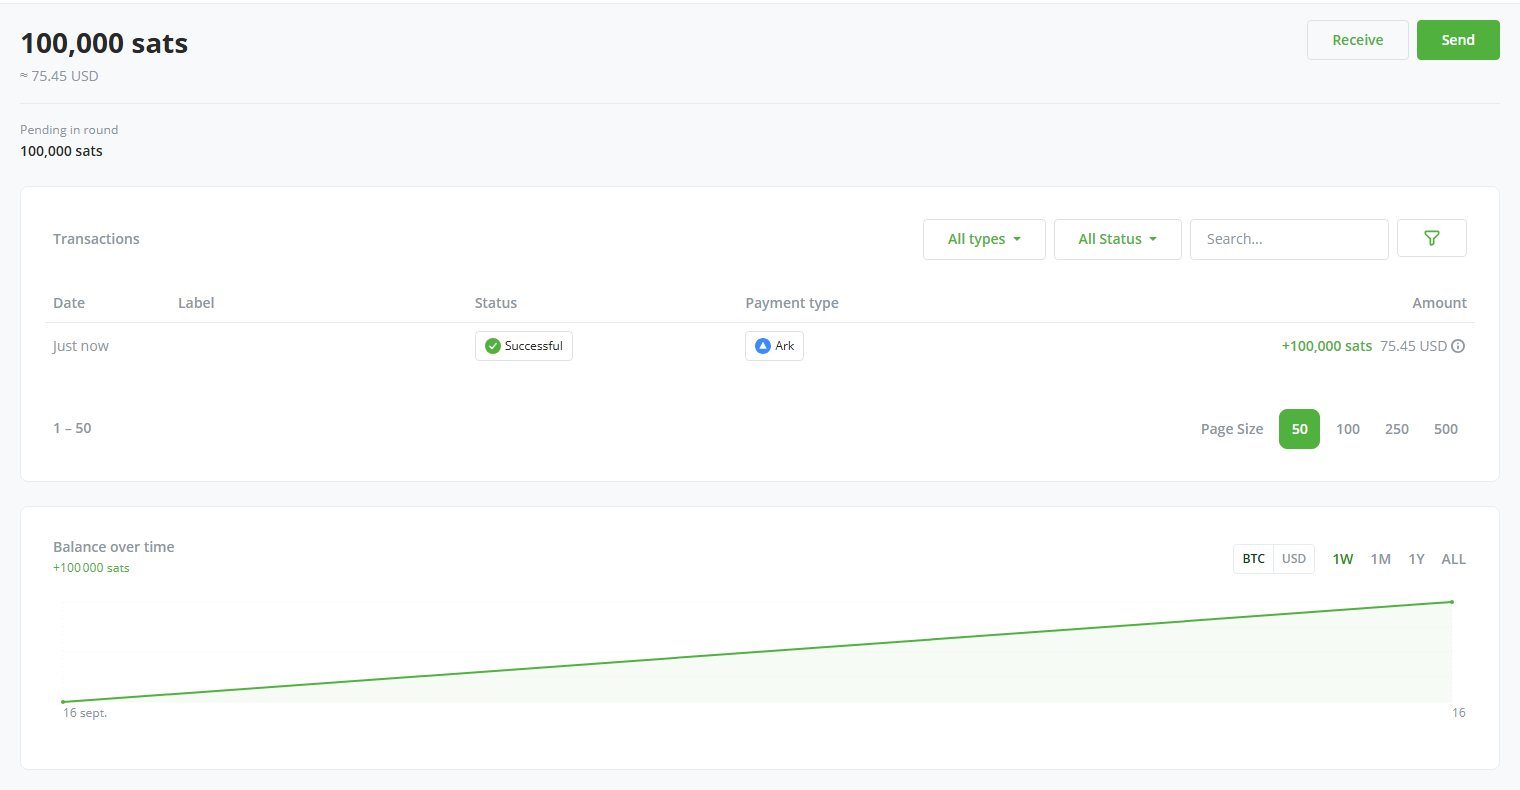
The main balance totals its sub-balances, and the transactions list mixes checkout payments with your own sends and receives
One main balance, several sub-balances
The headline figure totals every sub-balance, with its fiat value in your store’s default currency beneath. While all you hold is spendable off-chain bitcoin, the headline stands alone. As soon as you hold anything else, a breakdown appears under it, showing only the non-zero rows:The Bark on-chain balance is a separate wallet
The on-chain sub-balance is not your store’s regular BTCPay wallet. BTCPay Server and the Bark plugin use two separate on-chain wallets:- Native BTCPay wallet: Receives on-chain checkout payments. The plugin never spends from it.
- Bark on-chain wallet: Holds the reserve that pays the on-chain fees of an emergency exit. It also receives the bitcoin delivered by exits and by offboards. More on managing your Bark on-chain wallet.
Follow your balance over time
The Balance over time chart plots your whole wallet: off-chain, on-chain, and any bitcoin mid-exit. The plugin records a point every 15 minutes while the balance moves, at least every two hours otherwise, and adds a live point when you open the page. Switch the period with 1W, 1M, 1Y, or ALL, and the unit between BTC and your store’s currency.Transactions
The transactions list shows every payment your Bark wallet sends and receives, in the store’s own vocabulary:- Status: Successful, Pending, Failed, or Canceled.
- Payment type: Ark, Lightning, or On-chain, plus On-chain: Exit for emergency exit transactions and Ark: Refresh for refreshes.
- Amount: Positive for what you received, negative for what you sent, with the fiat value alongside.
This list is for Bark-handled payments only. Checkout payments over Lightning and Ark appear here, as do the on-chain payments you send and receive from the admin panel. For on-chain payments received on your checkout, you’ll need to go to the Bitcoin page.
Inspect a transaction
Select a row to open its Transaction details:- Where the bitcoin went or came from, as an address, an Ark address, or a Lightning invoice. On-chain wallet rows show the transaction ID and block height instead.
- The fee.
- Created and completed timestamps.
- The labels.
- A Copy raw JSON button for troubleshooting.
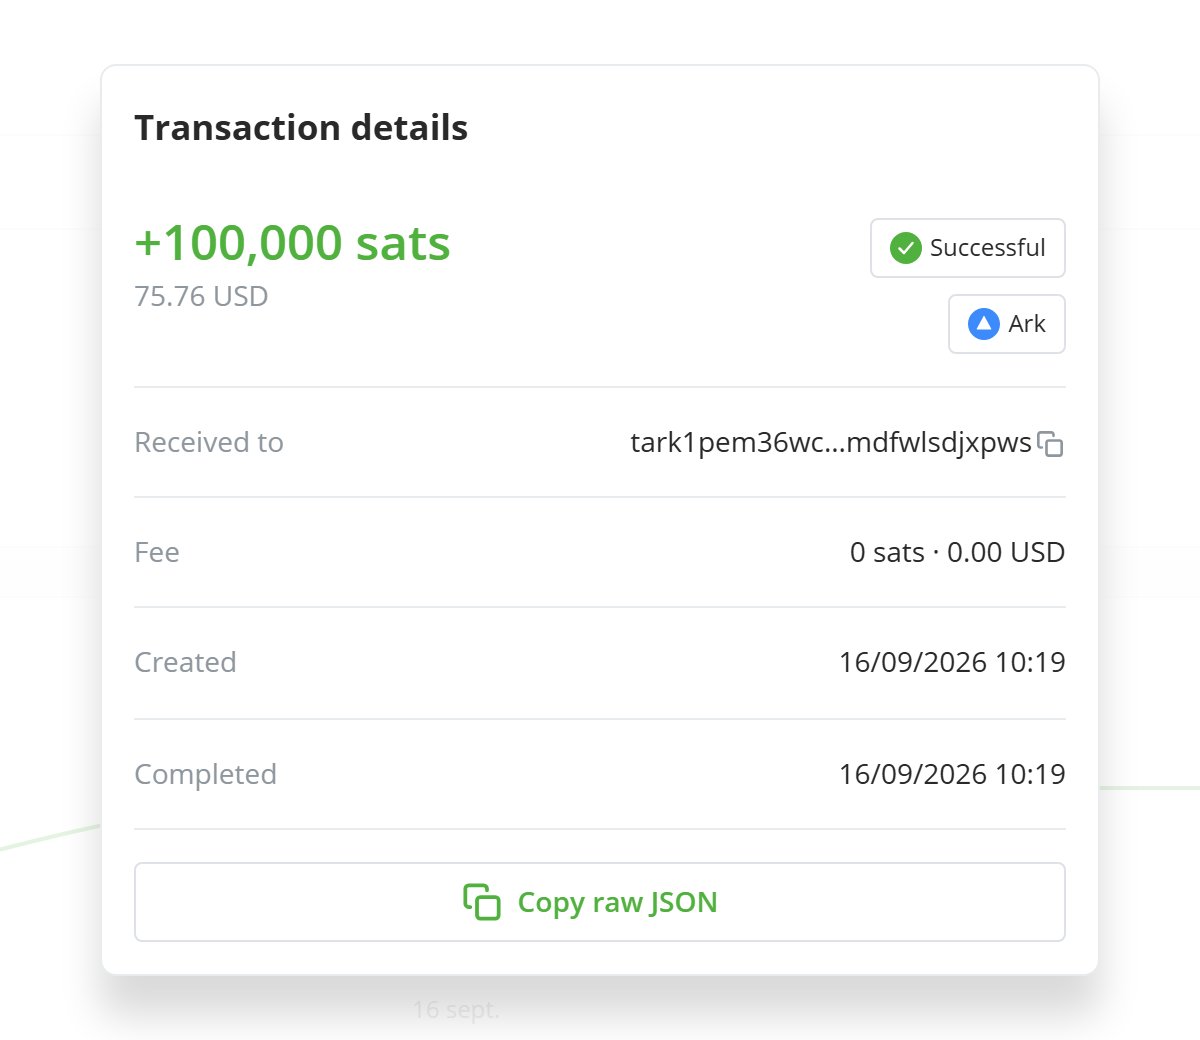
Every entry carries its destination, fee, timestamps, and labels
Label your transactions
Two kinds of labels mark the rows in the list and the details dialog:- Store labels: Labels you attach to Ark and Lightning payments on the Receive and Send screens. They are shared across the store, like BTCPay’s other labels.
- Checkout labels: The plugin tags every checkout payment it receives with an invoice label, plus app and payment-request labels when they apply. Each one links to the matching BTCPay invoice, app, or payment request.
Follow Bark from the store Dashboard
The plugin adds two widgets to your store’s Dashboard:- Ark Balance: Your off-chain balance, including bitcoin mid-exit, with its chart over 1W, 1M, or 1Y. It appears only while Bark drives your store’s Lightning, in place of BTCPay’s Lightning balance widget. It shows the last recorded point, so it can lag the wallet page by up to 15 minutes.
- Recent Bark Transactions: The five most recent Bark payments, with the same badges and labels as the wallet page, leaving out the Bark on-chain wallet’s own transactions. Select View All to open the full list.