

Before you start
You need:- A self-hosted BTCPay Server on version 2.4.4 or later, running on Linux x86-64. Installing plugins requires server admin access, so accounts on third-party hosts won’t work.
- A store on that server.
You don’t need to set up a Lightning node. If your store has no Lightning node connected, the Bark plugin takes over your store’s Lightning functionality. If it already has one, the plugin leaves it in place. See Lightning settings.
Install the plugin from the Plugin Directory
1
Open the Plugin Directory
Sign in to BTCPay Server as a server admin. At the top right of the interface, select the plugins icon to open its dropdown menu, then select Plugin Directory.
2
Select Bark
Search the directory for Bark, then select it in the results. A panel opens with the plugin’s details.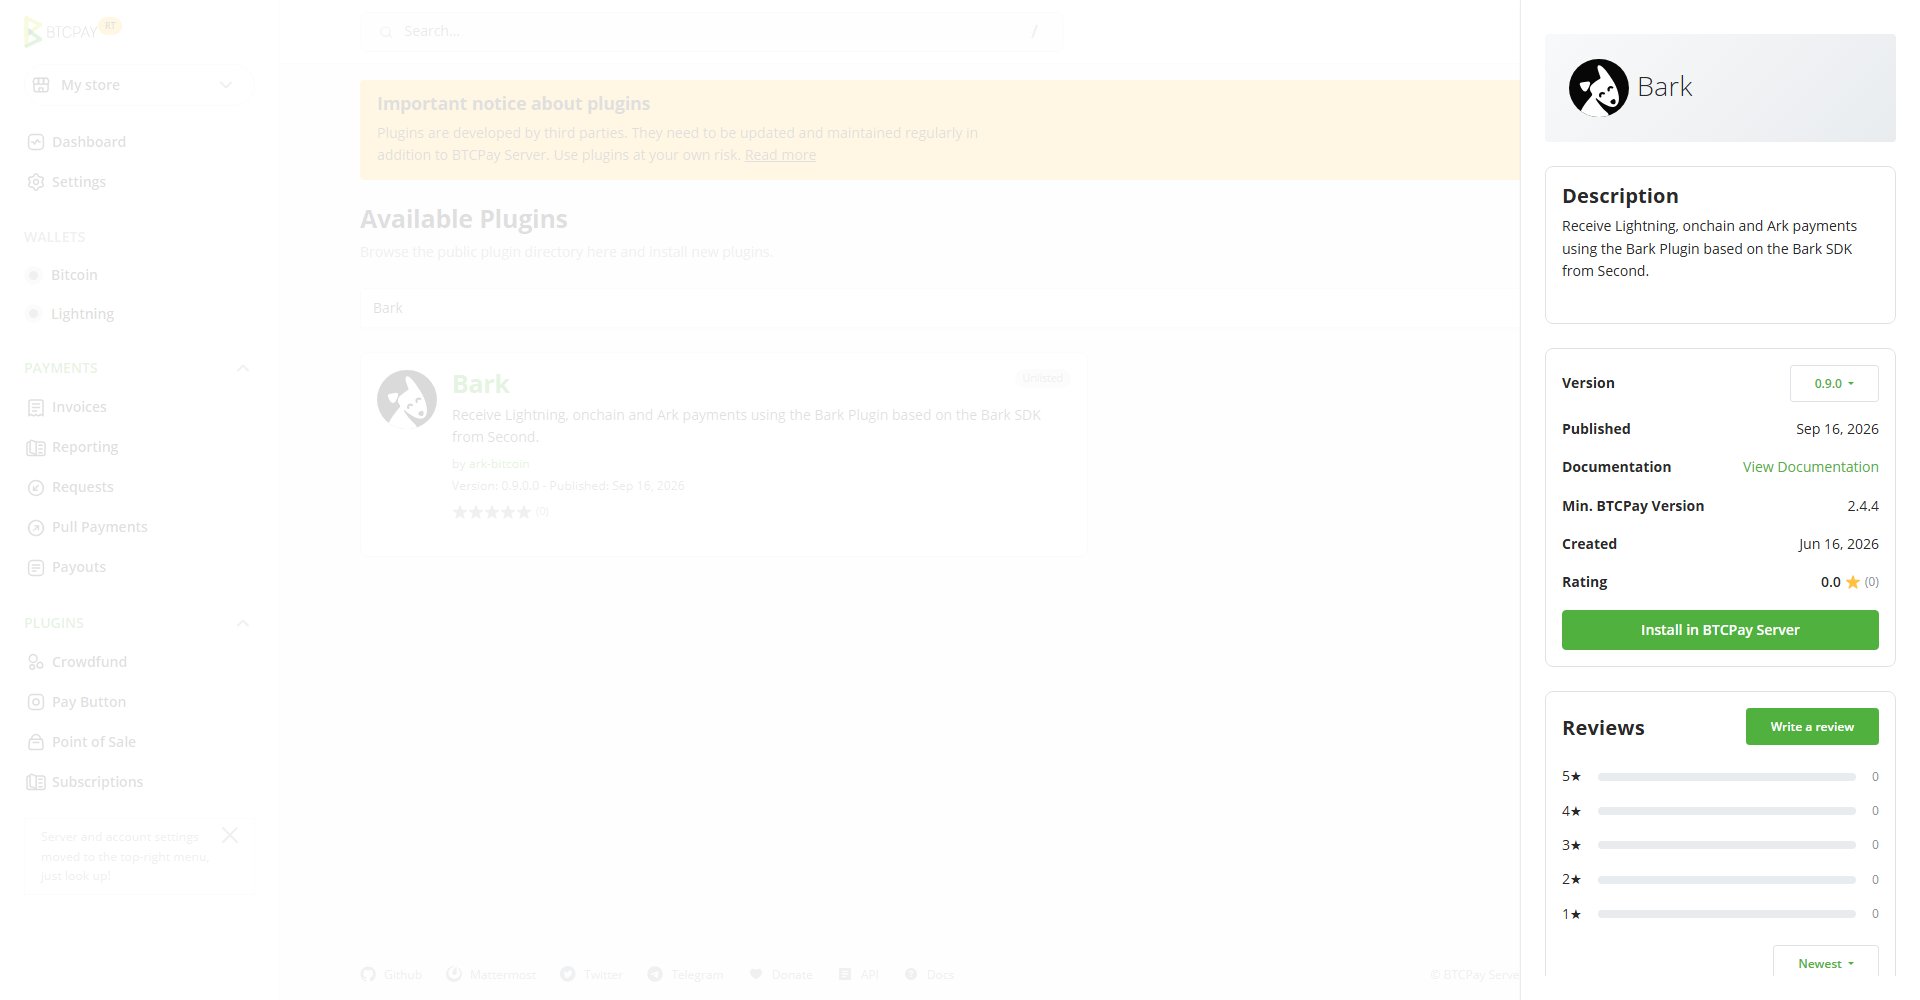
3
Select Install in BTCPay Server
Confirm with Install in the dialog that opens. BTCPay Server schedules the install.
4
Select Restart now
BTCPay Server loads the plugin during startup.
Install from the plugin file instead
Install from the plugin file instead
If your server can’t reach the directory, install the plugin from its file.
1
Download the plugin file
Download
BTCPayServer.Plugins.Bark.btcpay from the plugin’s page on the BTCPay Plugin Builder website.2
Open Installed Plugins
Open the plugins menu at the top right of the interface, then select Installed Plugins.
3
Select Upload Plugin
The button sits at the bottom of the page.
4
Upload the file
Browse to the file, then select Upload.
5
Select Restart now
Set up a Bark wallet for your store
After the restart, your store’s sidebar gains a Bark entry under Wallets. Opening it for the first time takes you to the Set up Bark screen.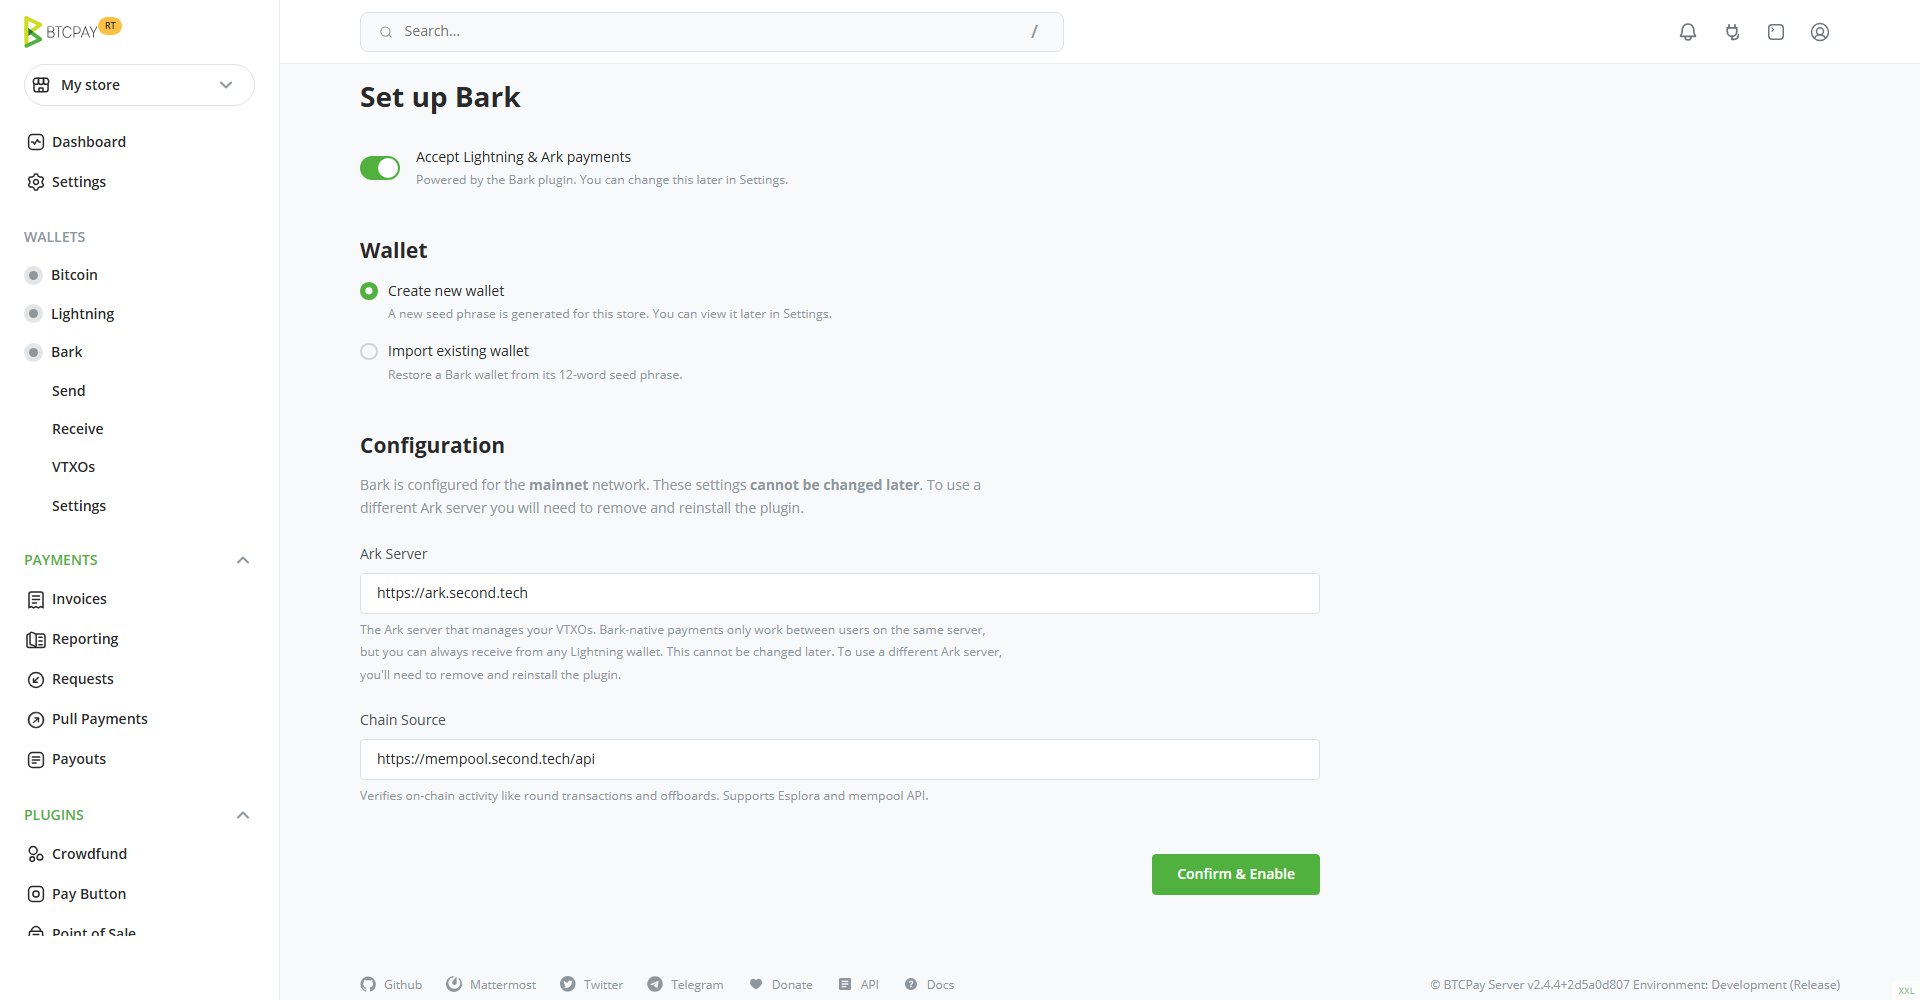
The Set up Bark screen, with the payments toggle, the wallet choice, and the pre-filled Ark Server and Chain Source fields
1
Select Bark in your store's sidebar
2
Keep the Accept Lightning & Ark payments toggle on
You can change this later in the plugin’s settings.
3
Keep Create new wallet selected
To bring back a wallet you already have instead, select Import existing wallet and enter its 12 words in the Seed phrase field, in order. You can paste the whole phrase into any field. Restoring from the phrase relies on the Ark server, and brings back the balance without the payment history.
4
Review the Ark Server and Chain Source
Both fields come pre-filled for mainnet:
https://ark.second.tech, the Ark server that manages your VTXOs, and https://mempool.second.tech/api, the chain source that verifies on-chain activity. See Ark server and chain source for the available options.The Ark server and chain source you confirm here can’t be changed later.
5
Select Confirm & Enable
The button reads Restore & Enable when you import a wallet. The plugin checks that both endpoints serve the right network, asks you to confirm any custom address, creates or restores the wallet, and opens the wallet page.
The plugin creates and manages your store’s wallet keys on the server. See Back up your wallet to keep them recoverable.
Check that Bark drives Lightning
Completing setup enables two new payment methods on your store’s checkout, Ark and Lightning:- You should see status lights turn green for Lightning and Bark in the sidebar.
- The Lightning page shows Custom Node with
barkas the node. - Checkout now shows a QR code and payment link that combines on-chain, Ark, and Lightning payment methods.